Easy DIY Giant Candy Decorations to Create a Sweet Wonderland
Get ready to turn your space into a sweet wonderland with our guide to very easy DIY giant candy decorations which are set to be the stars of your celebration. Join us on a journey of imagination and creativity, and let’s transform your surroundings into a sugary paradise that will captivate and delight all who enter.
Contents
DIY Giant Candy is Perfect Choice for any Party Decoration
Giant DIY candy decorations, a versatile choice that effortlessly adapts to the unique demands of any party setting. These larger-than-life DIY decorations confections serve as dynamic design elements, promising to sweeten the atmosphere and capture the imagination of guests across diverse occasions. From birthday extravaganzas to elegant Valentine’s Day decoration, the adaptability of DIY giant candy transforms any space into a whimsical wonderland, making them the ultimate choice for those seeking a flexible and visually delightful party decor option.
The charm of DIY giant candy decorations lies in its theme-agnostic brilliance, seamlessly blending with the ambiance of any celebration. Whether positioned strategically as focal points on tables or creatively adorning outdoor spaces, these sweet wonders bring vibrancy and joy to every corner. Their ability to cater to various age groups and design preferences makes them an ideal choice for customization, ensuring that the visual impact aligns perfectly with the tone and theme of the event.
In essence, the decorations of DIY giant candy stand as a testament to versatility, promising an enchanting and memorable experience for all who enter the sweet realm they create.
Most Creative Ideas for Giant DIY Candy Decorations
Dive into a world of sweetness and creativity with these 10 Most Creative Ideas for Giant DIY Candy Decorations. Elevate your decor game with these larger-than-life DIY giant candy decorations that promise to bring a whimsical touch to any celebration.
- Candyland Archway
Welcome guests with a Candyland Archway, featuring towering lollipops and vibrant candies. This whimsical entrance not only invites attendees into the celebration but also serves as a captivating photo backdrop, creating lasting memories.

- Gummy Bear Garland
String together oversized gummy bears for a playful and colorful display that transforms any space into a festive paradise. Perfect for hanging along walls or ceilings, it adds a burst of charm and creates a delightful atmosphere.
- Peppermint Twist Seating
Make a statement with Peppermint Twist Seating, using giant peppermint-shaped cushions to add both comfort and style to your event. These oversized sweets enhance the visual appeal, creating a unique and cozy atmosphere.
- Giant Cupcake Tower
Showcase your baking skills with DIY giant candy decorations of cupcakes made from tower, a visually stunning centerpiece that also offers a delectable treat for guests. Combining aesthetics with a sweet sensory experience, it adds a delightful focal point to your celebration.
- Cotton Candy Cloud Backdrop
Transform your event with a dreamy Cotton Candy Cloud Backdrop, creating a magical scene with fluffy materials reminiscent of cotton candy. This whimsical touch turns any space into a dreamlike ambiance for your celebration.

- Chocolate Bar Step Panels
Take a step into sweetness with Chocolate Bar Step Panels, transforming ordinary steps into delicious pieces resembling giant chocolate bars. This inventive touch combines functionality with aesthetics, creating a delightful and interactive element for your guests.
DIY Step-by-Step Guides on DIY Giant Candy Decorations for Your Party
Elevate your party decor at giftsus.net with our step-by-step instruction on DIY decoration of giant candy! Uncover the secrets to crafting whimsical confections that will turn your celebration into a sweet sensation. Get ready to bring a touch of magic to your next event!
Giant DIY Candy Decorations Made of Cotton
Step into a world of whimsy and warmth as we embark on the journey of crafting giant candy decorations made with the soft embrace of cotton. The ethereal touch of cotton which is highly recommended for decoration of DIY baby shower parties, helps transform these occasions’ decorations into delightful symbols of charm and fantasy, making them a perfect addition to any celebration or gathering.
Let’s find out how to craft these larger-than-life DIY giant candy decorations that are tactile marvels infusing your surroundings with a sense of comfort and sweetness.
- Step 1: Gather Materials Needed
Gather your crafting essentials – cotton batting for the soft base, sturdy cardboard for structure, acrylic paint for vibrant hues, and an assortment of colorful fabric scraps for that added touch of magic.
- Step 2: Shape Creation
Embark on the creative process by meticulously cutting the cardboard into whimsical candy shapes. Whether it’s the timeless swirl of a lollipop or the classic allure of candy, let your imagination guide the scissors.
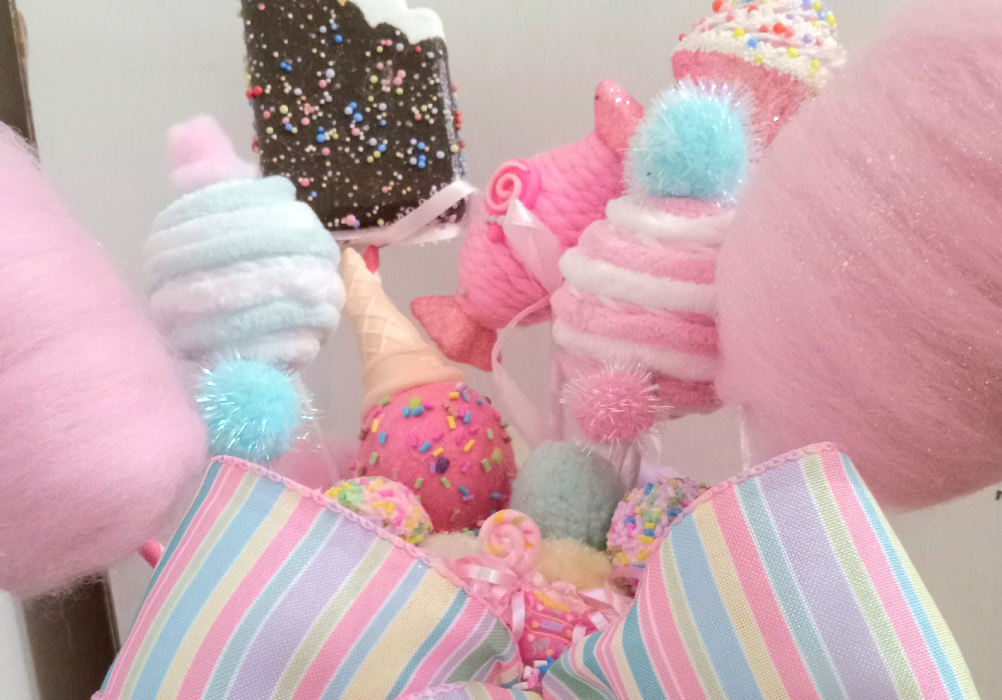
- Step 3: Cotton Coating
Envelop each cardboard shape in layers of cotton batting, securing it with a gentle touch of glue. This not only enhances the visual appeal for your DIY giant candy decorations but also creates a tactile experience, inviting hands to explore the fluffiness.
- Step 4: Decorate
Unleash your artistic flair as you bring each candy creation to life. With acrylic paint, add lively colors, patterns, and details. The vibrant interplay of colors against the soft cotton canvas ensures these giant candy decorations become enchanting focal points in any setting.
- Step 5: Add Final Touch
Allow your masterpieces to dry completely, and marvel at the transformation. These giant cotton candy wonders are ready to be displayed, infusing your space with an everlasting sense of joy and sweetness.
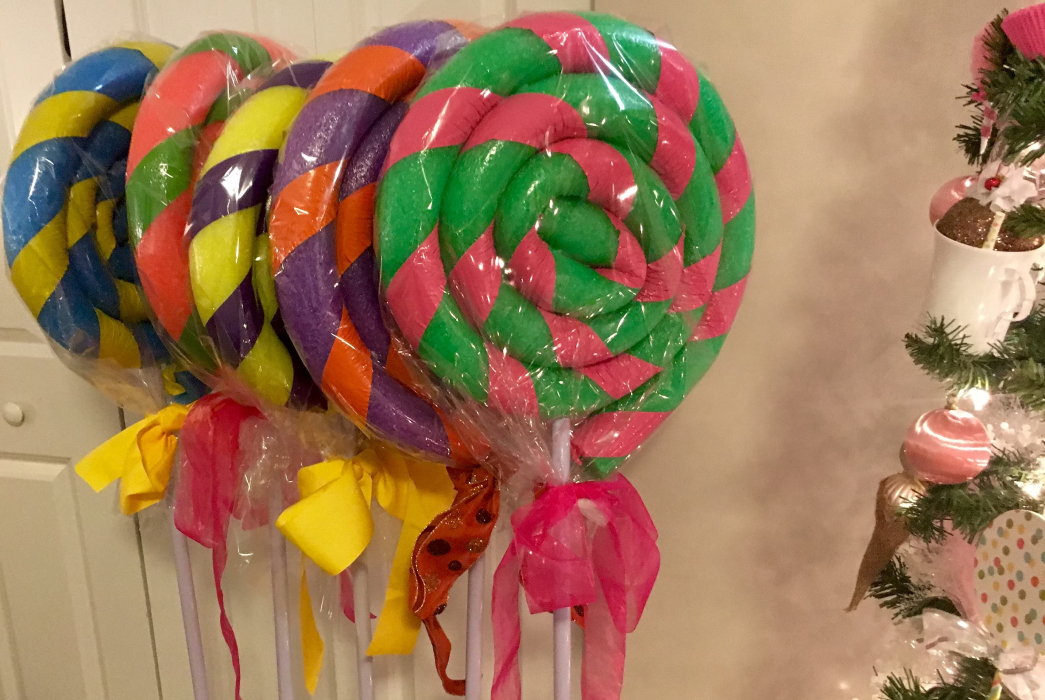
DIY Decoration of Giant Candy Cane for Christmas
As the festive season approaches, immerse yourself in the joy of crafting a DIY giant candy cane decoration is a food gift idea for Christmas which captures the essence of the occasion. These ideas of DIY giant candy decorations are not just about ornaments; it’s about creating a visual symphony of holiday spirit and decorative finesse that will be cherished by all who behold it.
- Step 1: Gather Needed Materials
Assemble the materials for this yuletide venture – PVC pipes for structural integrity, red and white tape for the iconic candy cane stripes, a stable base for support, and perhaps some additional embellishments to add that extra festive touch.
- Step 2: Build the Structure
Lay the foundation of your giant DIY candy decorations by constructing the candy cane shape with PVC pipes. Ensure that the structure is not only visually appealing but also robust enough to withstand the excitement of the festive season.
- Step 3: Wrap with Tape
Embark on the joyful task of wrapping the PVC structure with red and white tape, carefully creating the beloved stripes that define the classic candy cane DIY giant candy decorations. This step is where the magic truly begins to unfold.

- Step 4: Enhance with Decor
Elevate your giant candy cane by adding any extra decorative elements that resonate with the holiday theme. Whether it’s festive ribbons, sparkling ornaments, or twinkling lights, let your creativity flow and infuse the candy cane with the magic of Christmas.
- Step 5: Secure and Display
Anchor your masterpiece securely to a stable base, ensuring it stands proudly as the centerpiece of your festive decor. The giant candy cane is now ready to spread holiday cheer and become a cherished part of your Christmas traditions.
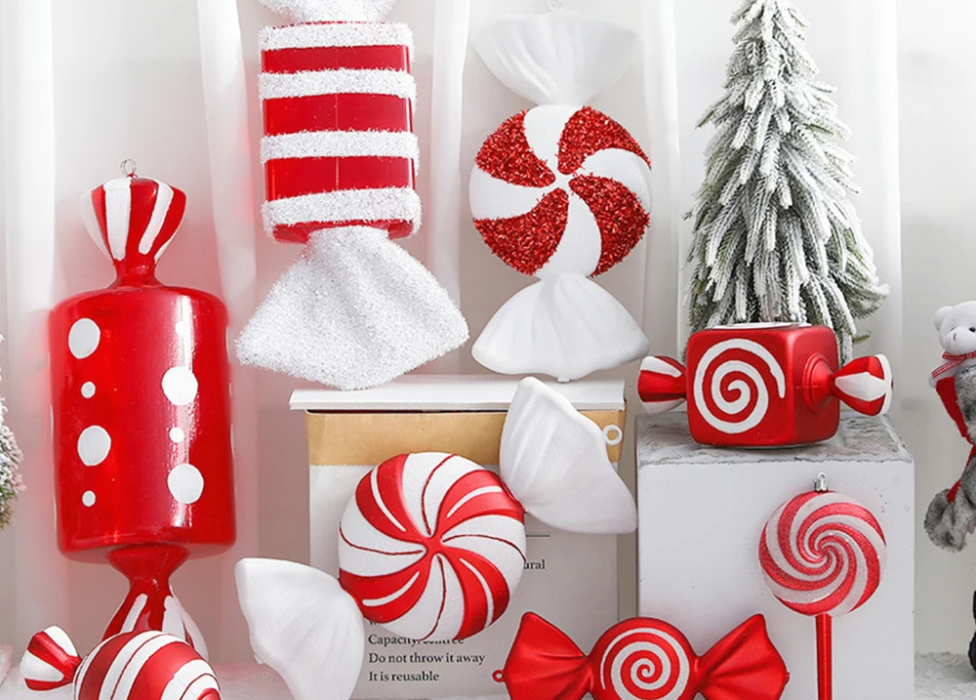
DIY Giant Candy Decorations Peppermint
Embark on a journey of sensory delight as we delve into the creation of DIY giant peppermint candy decorations. The cool and invigorating allure of peppermint is captured in these larger-than-life creations, promising to turn any space into a sweet sanctuary of style and elegance.
- Step 1: Gather Materials
Assemble the crafting essentials for DIY decoration of giant candy of peppermint- foam or sturdy cardboard for durability, high-quality red and white paint for a lifelike appearance, and a clear sealant to protect these peppermint wonders from the passage of time.
- Step 2: Cut the Shapes
Begin the artistic process of creating peppermint DIY giant candy decorations by precision-cutting the chosen material into sizable peppermint candy shapes. Consider variations in size to add visual interest and depth to your peppermint display.

- Step 3: Paint Stripes
Infuse life into your peppermint creations by applying alternating red and white stripes. The careful attention to detail in this step ensures that the final result mirrors the classic appeal of peppermint candy.
- Step 4: Seal and Display
Seal the deal, quite literally, by applying a clear sealant to your peppermint decorations. This not only enhances their durability but also adds a subtle sheen, making them an elegant addition to your decor. Proudly display these giant peppermint wonders, turning any space into a refreshing haven of visual delight.
Decorating Tips for Your DIY Giant Candy
Transforming your space with DIY giant candy decorations is a delightful way to infuse whimsy and charm into any setting. Whether you’re preparing for a party or simply want to add a sweet touch to your surroundings, these larger-than-life confections are versatile and fun. Here are four tips to help you strategically decorate with your DIY giant candy creations.
- Entrance Elegance
Place giant candy canes or lollipops near the entrance to create a visually stunning welcome. This not only sets the tone for your event but also invites guests into a whimsical world of sweetness as soon as they arrive.
- Festive Focal Points
Use your DIY giant candy decorations as focal points in key areas of your space. Whether it’s a giant peppermint centerpiece on the dining table or a lollipop display in the center of the room, strategically positioning these creations ensures they capture attention and become conversation starters.

- Pathways of Sweetness
Line walkways or paths with giant candies to guide guests through your event. This not only adds a playful touch to the environment but also serves as a charming wayfinding element, directing everyone towards the heart of the celebration.
- Candy Buffet Extravaganza
Create a stunning candy buffet display featuring your giant candy decorations. Position lollipops, peppermints, and other oversized treats alongside smaller, real sweets for a delightful and cohesive dessert station. This not only satisfies the sweet tooth but also makes for a visually enticing and interactive experience for guests.
Final Words
As you wrap up your DIY giant candy decorations adventure, revel in the satisfaction of turning ordinary spaces into extraordinary wonderlands. These step-by-step guides have empowered you to infuse your creativity and imagination into every celebration.
Whether it’s the joy of crafting, the thrill of transforming your environment, or the delight these confections bring to others, your journey into decorations of DIY giant candy concludes with a sweet sense of accomplishment. Now, go ahead and let the magic of your creations enchant every party and gathering, leaving a trail of smiles and memories in their wake. Happy decorating!
Comments are closed, but trackbacks and pingbacks are open.